Taking a screenshot on a laptop can vary depending on the operating system you are using. Whether you are using a Mac or a Windows laptop, this guide will walk you through the steps for each platform, making it easy to capture your screen with just a few clicks.
How to Take a Screenshot on a Mac Laptop
Mac laptops have several built-in methods for taking screenshots, each serving different purposes. Here are the most commonly used methods:
1. Capturing the Entire Screen
To capture the entire screen on a Mac, follow these steps:
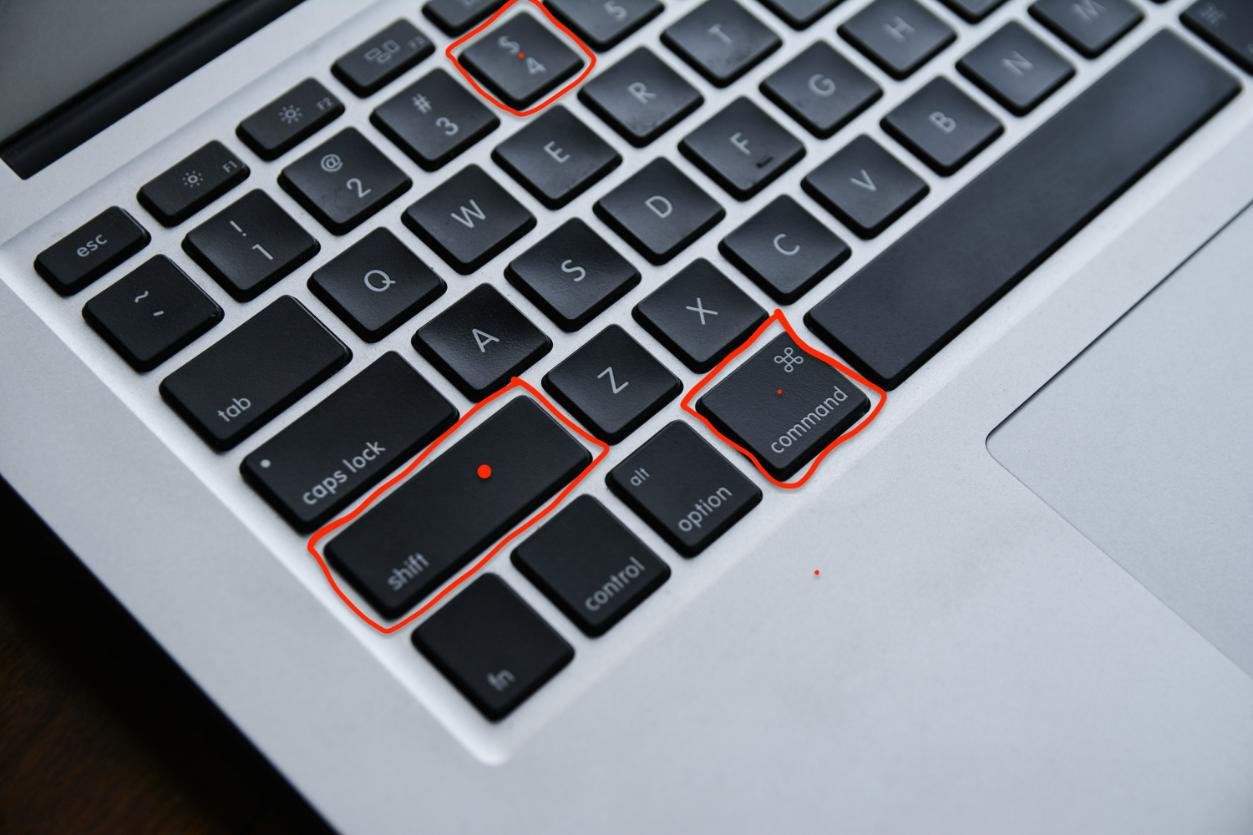
- Press
Shift + Command (⌘) + 3. - The screenshot will be saved to your desktop.
2. Capturing a Selected Portion of the Screen
To capture a specific area of your screen:
- Press
Shift + Command (⌘) + 4. - Your cursor will change to a crosshair.
- Click and drag to select the area you want to capture.
- Release the mouse button to take the screenshot.
- The screenshot will be saved to your desktop.
3. Capturing a Specific Window
To capture a specific window or menu:
- Press
Shift + Command (⌘) + 4, then press theSpacebar. - Your cursor will change to a camera icon.
- Click on the window or menu you want to capture.
- The screenshot will be saved to your desktop.
4. Using the Screenshot Toolbar (macOS Mojave and Later)
For more options, use the Screenshot Toolbar:
- Press
Shift + Command (⌘) + 5. - The toolbar will appear, offering options to capture the entire screen, a selected portion, or a specific window.
- Choose your desired option and follow the on-screen instructions.
- The screenshot will be saved to your desktop.
How to Take a Screenshot on a Windows Laptop
Windows laptops also provide several methods to capture screenshots, catering to different needs. Here are the most commonly used methods:
1. Capturing the Entire Screen
To capture the entire screen on a Windows laptop:
- Press the
Print Screen(PrtScn) key. - The screenshot will be copied to your clipboard.
- Open an image editor (e.g., Paint) and paste the screenshot (
Ctrl + V). - Save the image to your desired location.
2. Capturing the Active Window
To capture the active window:
- Press
Alt + Print Screen(PrtScn). - The screenshot will be copied to your clipboard.
- Open an image editor and paste the screenshot (
Ctrl + V). - Save the image to your desired location.
3. Capturing a Selected Portion of the Screen
For capturing a specific part of the screen:
- Press
Windows + Shift + S. - The screen will dim, and your cursor will change to a crosshair.
- Click and drag to select the area you want to capture.
- The screenshot will be copied to your clipboard.
- Open an image editor and paste the screenshot (
Ctrl + V). - Save the image to your desired location.
4. Using the Snipping Tool or Snip & Sketch
Windows offers built-in tools for more advanced screenshot options:
- Snipping Tool (Windows 7, 8, 10):
- Open the Snipping Tool from the Start menu.
- Click “New” and select the type of snip you want (Free-form, Rectangular, Window, Full-screen).
- Capture the screenshot and save it.
- Snip & Sketch (Windows 10, 11):
- Press
Windows + Shift + S. - The Snip & Sketch toolbar will appear at the top of the screen.
- Select the type of snip you want (Rectangular, Freeform, Window, Full-screen).
- Capture the screenshot and it will be copied to your clipboard.
- Open Snip & Sketch to annotate or save the screenshot.
- Press
Conclusion
Taking a screenshot on a laptop, whether it’s a Mac or a Windows device, is a straightforward process once you know the right shortcuts and tools. Mac users can rely on a combination of keyboard shortcuts and the Screenshot Toolbar, while Windows users can use the Print Screen key, Snipping Tool, or Snip & Sketch for their capturing needs. With these methods, you can easily capture and share your screen, whether for work, study, or personal use.


